Page 1 of 2
JD Kit pump timing screw O-ring
Posted: Sat Oct 14, 2006 5:59 pm
by Halen
I was wondering if anyone could tell me if this is the correct way of installing the pump screw O-ring supplied with the JD jetting kit.

Does it just hold the linkage tighter to the screw assembly? Since I have the carb all the way out I would like to have it all back together the 'right' way before the re-installation.
thanks
Posted: Sat Oct 14, 2006 6:46 pm
by Asmith
Is this what you are looking for?
I've got a nice PDF of the whole "Red Beard Mod". PM me with your e-mail and I'll send it. Nice step by step with color pics.

Posted: Sat Oct 14, 2006 7:03 pm
by Halen
Yes... that is what I needed
Thanks... I have PM'd you and I guess I owe ya a beer
Posted: Mon Jan 15, 2007 12:16 pm
by joegencon
Great pic ~, JD needs to put a color or at least another pic of this in their kit. The one that comes with the kit cannot be seen that well.
Posted: Mon Jan 15, 2007 3:06 pm
by beerhunter
Will this mod. help me to remove more the bog I still have?
If so, what size o ring ya'll using?
thanks guys,
Posted: Mon Jan 15, 2007 3:16 pm
by Asmith
beerhunter wrote:Will this mod. help me to remove more the bog I still have?
If so, what size o ring ya'll using?
thanks guys,
Yes.
The two O-Rings used in the AP mod are sized as follows:
Small O-Ring
W=1/16" ID=1/4" OD=3/8"
Large O-Ring
W=3/32" ID=1/4" OD=7/16"
PM with your e-mail address and I'll send it to you.
Posted: Tue Jan 16, 2007 9:26 am
by Ray
Just had the o-rings sent to me from JD. Which o-ring are you guys installing? Has anyone been able to install the o-ring with the carb still on the bike? I have a Quickshot AP cover and a 55 leak jet if it matters.
Posted: Tue Jan 16, 2007 3:02 pm
by joegencon
I did it with the carb on the bike but you must be patient a little dental tool works great to pull while twisting. Too small for the fingers.
Posted: Wed Jan 17, 2007 11:41 am
by NCLR1
I did everything with the carb in the bike. It was a bear, but I was hesitant to disconnect everything since it was late and I was about 8 monsters into it. I used the thicker oring and put it on with my fingers. Have patience.

O ring mod HOW?
Posted: Sat Jun 20, 2009 6:52 pm
by staticbags
how in the world did you guys put it on in the bike (250X)? Is this like a "snipe hunt" where yall laugh while I go back out there and try for another few hours to get to it.. I can barely see the throttle cover and have yet to get the cover off... I'm going back to try, hopefully i'll come back in and see some replys with some tips.
Jeff h
[email protected]
Posted: Sat Jun 20, 2009 10:23 pm
by bosshaug1
I did it with the carb on the bike -twice. First with the thin o-ring, didn't feel like it did that much. So I did it again with the thick o-ring.
I used the dental floss method both times. The way to do it is to tie a large loop through the o-ring. Then use you fingers, or a tool to place it over the set screw, being careful to get most of it over the back (closest to carb) of the set screw. Then pull the floss from the left, and behind the frame to get it over the AP arm. Once the o-ring is on, cut the loop and remove the floss.
Honestly, the first time I did it, I had the most trouble trying to line up and bolt down the cover.
Good luck, it is not easy, but very do-able.
Posted: Sun Jun 21, 2009 7:05 am
by Codeman00
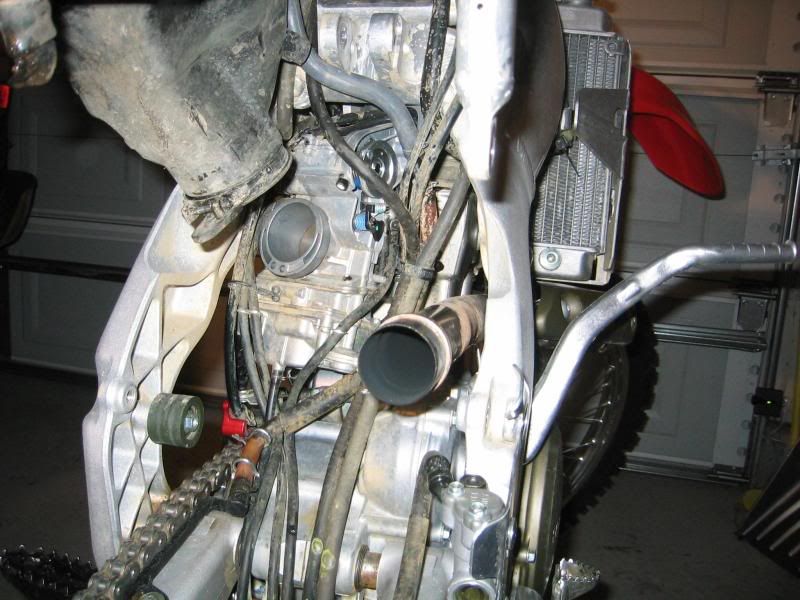
I thought it was an impossible feat on the X also...but its not. Make sure you are removing the lower subframe bolts and pivot the subframe up but don't go past 90 degrees otherwise you will pull tubes off. Remove the upper and lower shock bolts....remove the shock, and you are in. You can feed an allen wrench from the front and watch it through the back (under the subframe) to remove the AP pump cover.
Then put the Oring on. I thought it was easy to put the O-ring on by hand with the subframe up and the shock out of the way. I didn't need the floss.
Subframe up...before shock removal
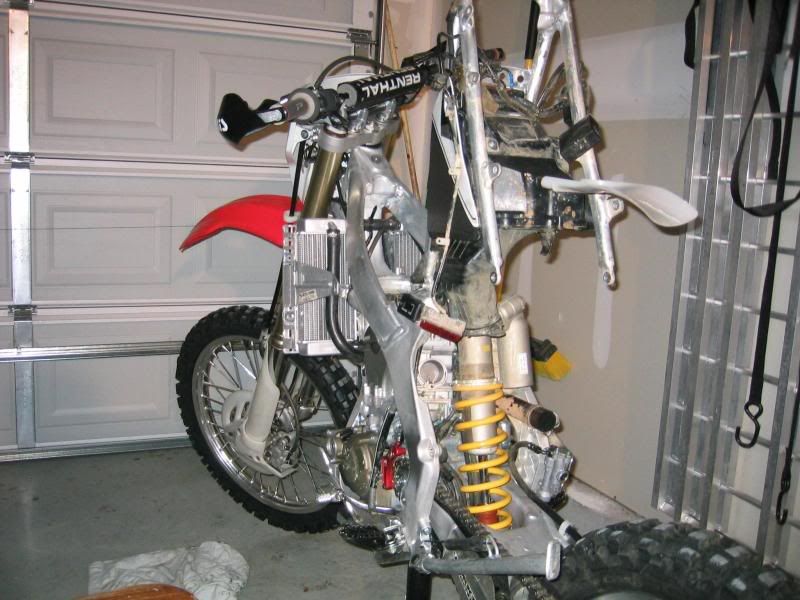
Shock Removed...easy access
Re: O ring mod HOW?
Posted: Sun Jun 21, 2009 7:18 am
by Asmith
staticbags wrote: Is this like a "snipe hunt" where yall laugh while I go back out there and try for another few hours to get to it..
LMAO!!!!
No...but that's not a bad idea.

I DID it
Posted: Sun Jun 21, 2009 12:20 pm
by staticbags
before i had read yalls reply post (which i appreciate muchJ).
did not use flos method (never heard of it)
I did remove header pipe and that gave me more hand room. with a "pick type tool, i put LARGE oring on screw then came from behind, hooked the oring and pulled it over the black plastic piece. Actually oring went on in one minute. Header off really helped.
Oring was easiest part, maybe first time luck.
Getting the throttle cover plate off is what took so long. could never get allen wrench in good spot and hand would not fit in to turn.
It all went back together easier than i expected also. It looks impossible, but your right, doable.
I like the frame rotate up method. I did not do that till i was finished trying to get carb and airbox to fit back together.
thanks for all the help.
jeff h
austin
now looking forward to next weekend riding with old LSU friends in and around Durango. Temp there 60 temp in austin tx now 100+ .
GEAUX LSU
jh
Posted: Tue Jun 23, 2009 8:40 am
by Halen
Canadian Snipe Hunting season opens June 30th - July 15th.
Limited Draw
Only 'Certified' Snipe Hunter licencees (or you can go with a Guide)
$100 per day (will take CDN$ at par)
An experience you will NEVER forget!!!
Contact me for more information
later... Van