How to: Honda CRF Showa Fork rebuild seals and oil change
Posted: Mon Jan 15, 2007 12:37 am
Well finally, here it is. Sorry it took forever. If you have any changes or better ideas let me know and I'll add them. It's worked on my 2005 CRF450X and a friends 2003 CRF450R.
Also, it's probably a good idea to clean your bike anytime before you work on it. As you'll notice I didn't do too good a job and the axle holder has a bunch of dirt on it. If you drop any of this in the fork it wouldn't be good. So do a better cleaning job than I did.
CRF450R CRF450X
Showa Fork Rebuild Procedures / Steps
Required Parts:
Fork Fluid - We used 5 weight from Maxima
Pivot Works Fork Seal Kit - or you can purchase just new seals and bushings
if required. Factory connection makes a superior Fork seal that has a more pliable
rubber and seals a little better.
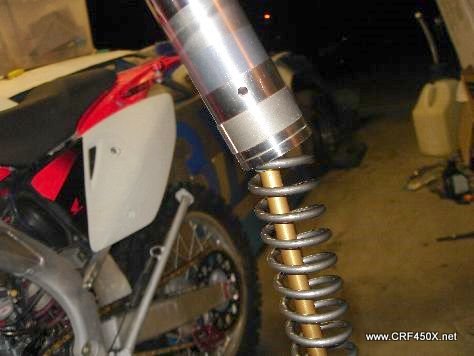
First off measure
how high your forks sit above the top triple clamp.

Remove your front
wheel and brake caliper.

Remove your lower
fork protectors.
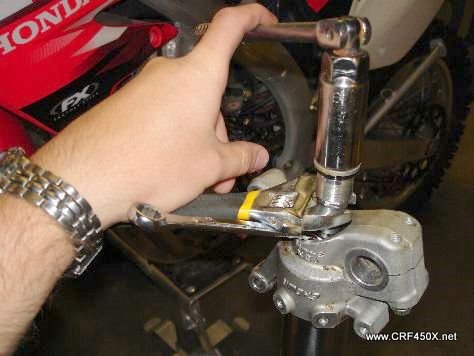
Loosen your upper
and lower triple clamps and lower the fork down so you can
place the fork wrench between the triple clamp and the fork. Tighten the lower
clamp lightly to hold the fork tube while you loosen it. Once you've loosened
the
top cap, remove the fork.

Mark down how many
clicks out you have your rebound adjuster at and then turn
counterclockwise until it stops.
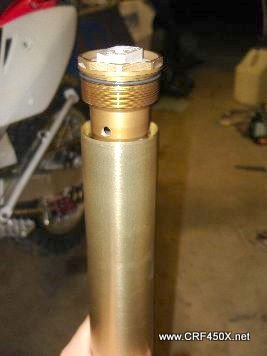
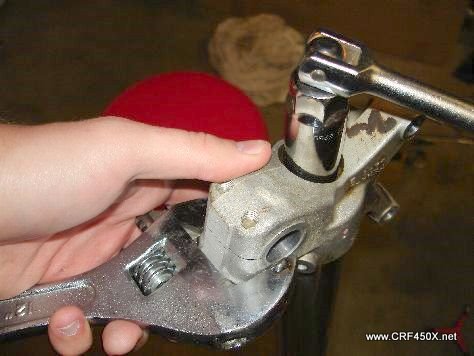
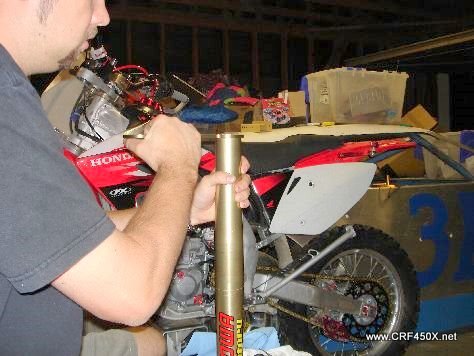
Hold the outer fork
tube and completely loosen the fork cap.

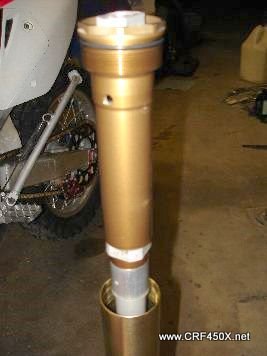
Slide the outer
tube down from the fork cap.
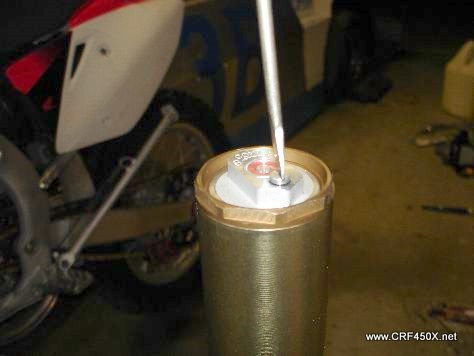
Remove the air bleed
screw on the fork cap.
Drain the forks
completely. See your owners manual page 87 for how much
fluid will remain after you have drained the forks.
Hand tighten the
cap and upper fork tube back together. Replace the air bleed screw.

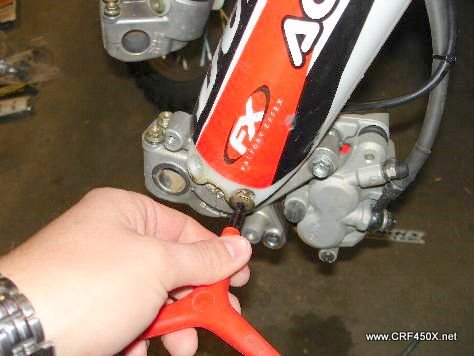
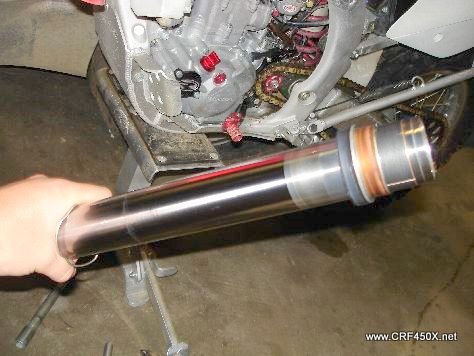
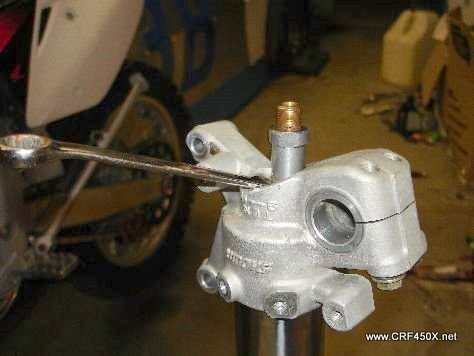
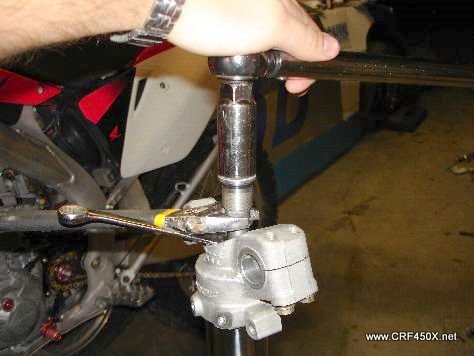
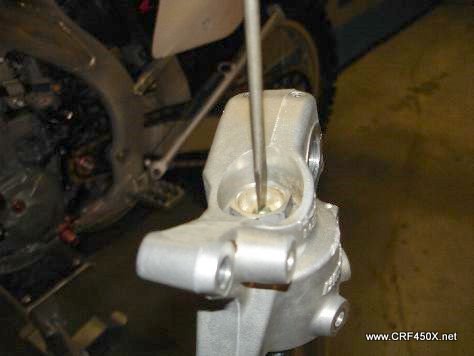
Flip the fork over,
you'll be loosening this bolt The fork center bolt.
We used a breaker
bar and a crescent wrench to hold the fork foot in place.
Once the bolt is
loose, press down on the fork leg and the inner rod will come out of
the fork. Place a 10mm wrench around the tube between the foot and the center
bolt to keep it up and in place.

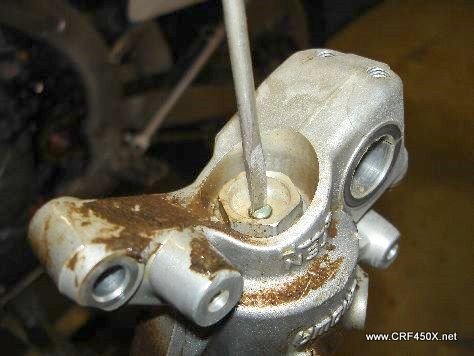
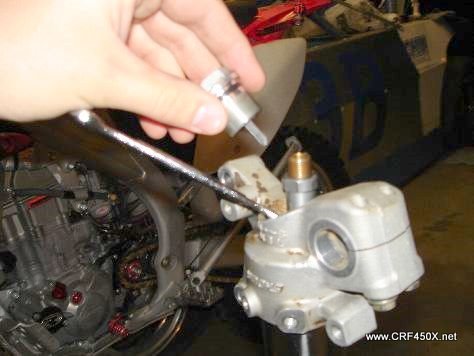
Place a wrench on
the lock nut and a socket on the fork center bolt.
Remove the fork
center bolt.

Use the fork center
bolt to remove the rod down in the fork. Slightly twise the fork
to remove the rebound adjustment rod.
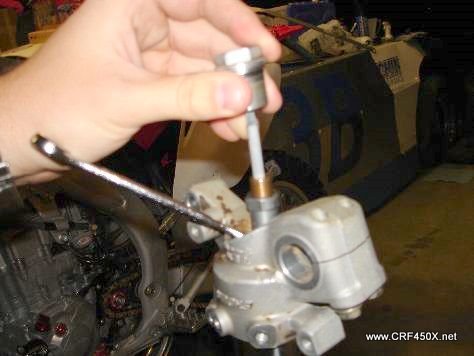
Completely remove
the rod.
Here's the rod and
adjuster.

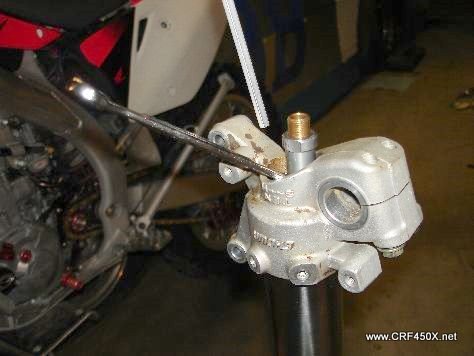
Remove the wrench
and let the rod slide back into the fork leg.
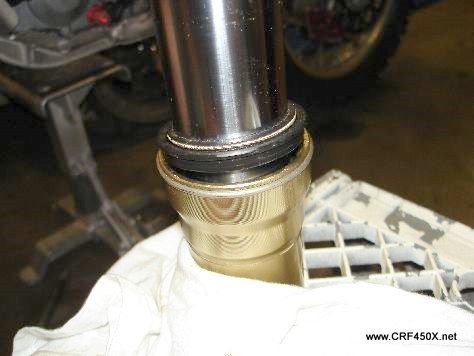
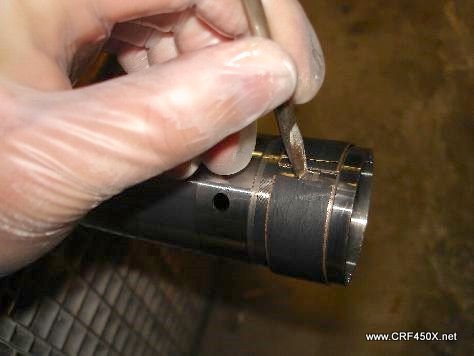
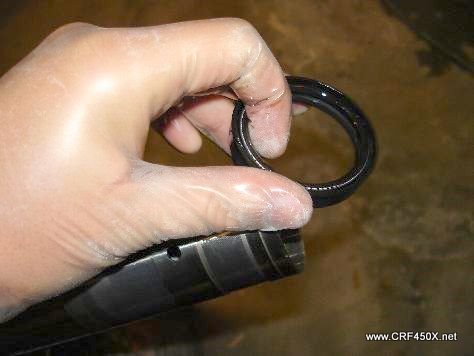
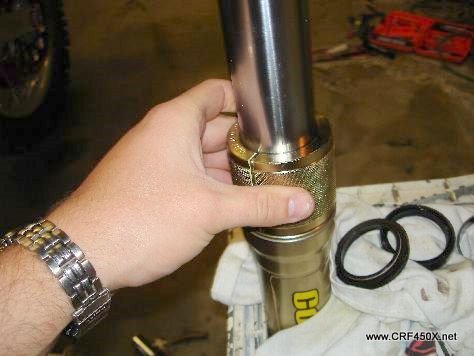
Use a screw driver
to pry the dust seal from the upper fork tube.

Completely slide
up the dust seal.
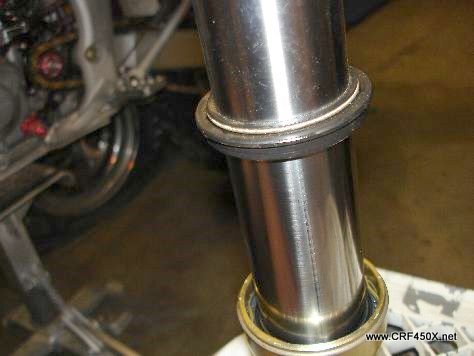
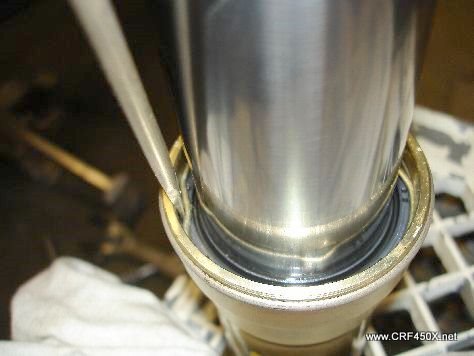
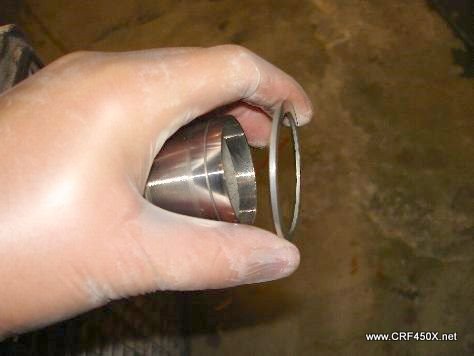
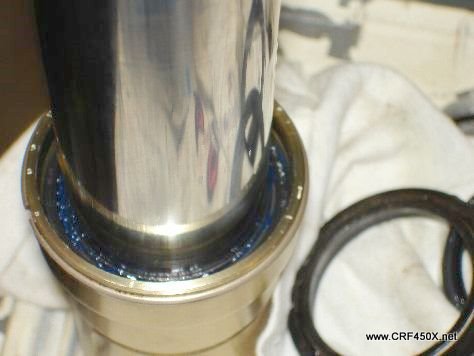
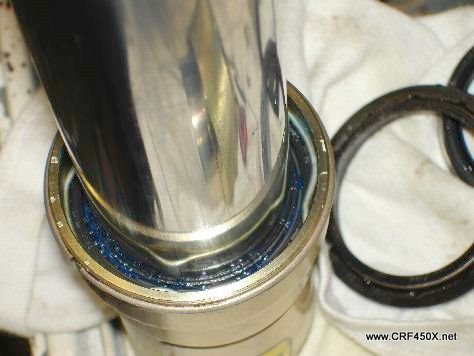
Use a screw driver
to remove retaining ring.
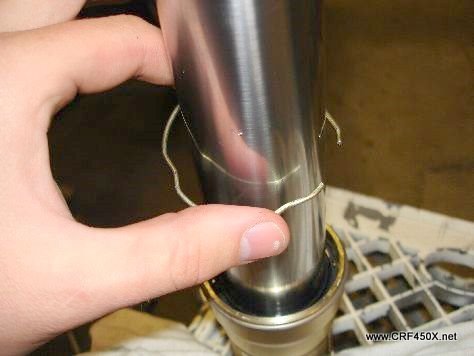
Now grab the lower
fork leg in one hand and the upper fork leg in the other.
Collapse the tube and pull them apart in the same fashion as a slide hammer.
The lower fork leg will come loose (it makes a mess so be prepared).
Place the spring back into the upper fork tube. This is what you'll now have.

Here's the lower
fork tube with both the bushings, the washer and the seal.
Use a screwdriver
to pry the upper bushing apart and remove it from the lower
fork leg.
Remove the lower
bushing from the lower fork leg.
Remove the washer
from the lower fork leg.
Remove the seal
from the lower fork leg.
Remove the retaining
ring from the lower fork leg.

Remove the dust
seal from the lower fork leg.
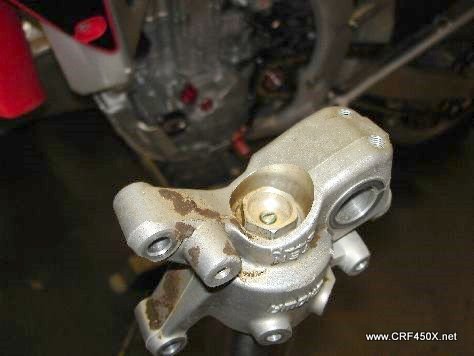
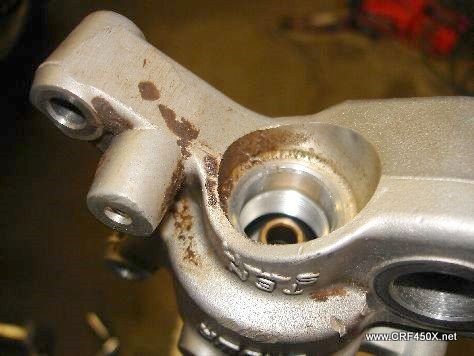
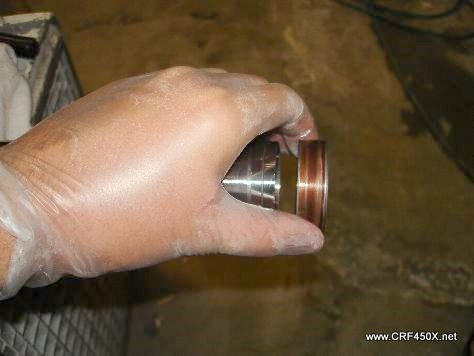
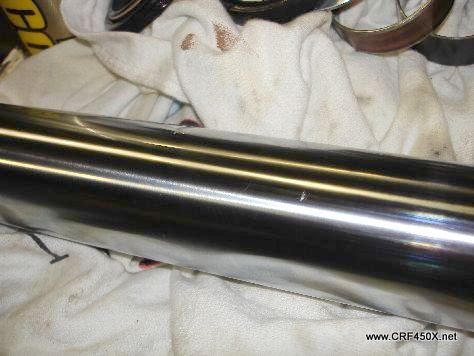
Clean and check
your lower fork leg for any problems. Any deep nicks can tear
new seals. Here's a pretty good gouge on one, but we'll run it.
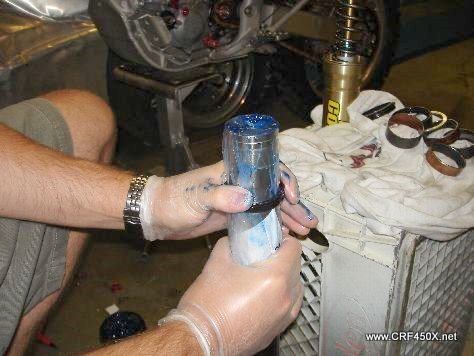
Place a sandwich
bag over the lower fork leg.

Grease up the sandwich
bag so you don't tear the seals as you put them on.

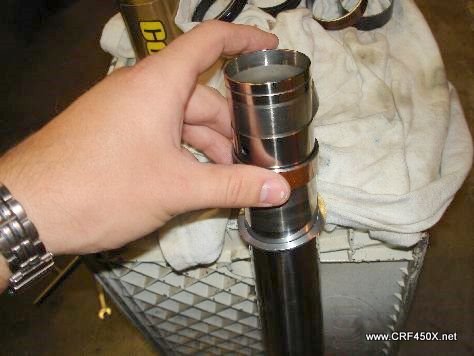
Place the dust seal
on first. Spring facing towards the bottom of the fork.

Place the reatining
ring on next followed by the fork seal. With the spring facing up
part number facing down.
Remove the baggy
and place the washer back on.

Place the Lower
bushing back into place. If your reusing your old bushing make
sure to check the inside surface of this bearing. It's teflon coated and should
be black
with no silver or copper showing through it. If any of the surface isn't black
the
bushing should be replaced. Replace the upper fork bushing but inspecting it's
outside surface.
Place the lower
fork tube back over the spring into the upper fork tube. Slide
the lower bushing back down into the upper fork tube.

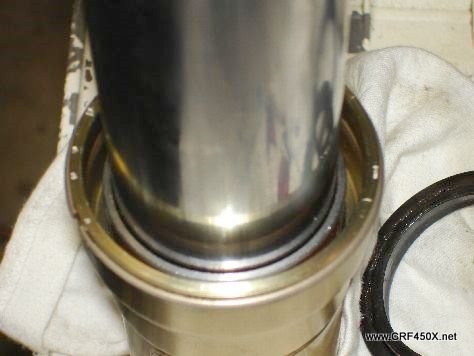
Use the seal/bushing
driver to press them back down into place again using a
slide hammer motion. Not much pressure or force is needed for this.
Make sure it's seated
then lower down the washer into the upper fork tube.

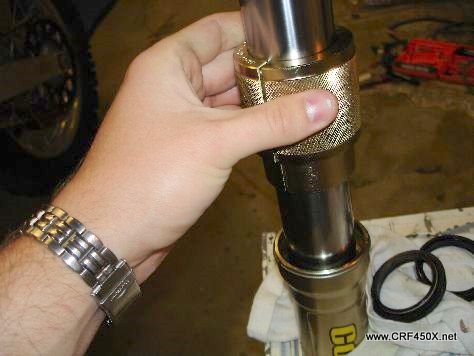
Press the fork seal
back into place and use the fork/seal driver to ensure it's seated.
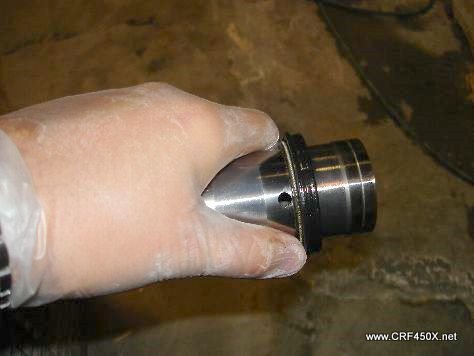
Place the retaining
ring back into place ensuring that it's seated in the grove all
the way around.
Place the dust seal
back into place.

Using your wrench
again push down on the fork foot and push the outer rod back
out and place the wrench underneath.
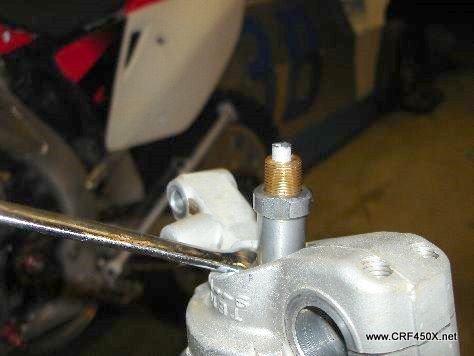
Place the rebound
adjustment rod back into place and ensure it's seated.
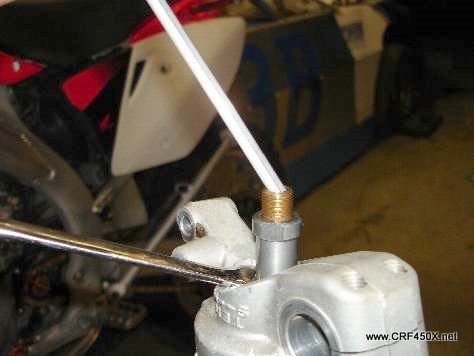
If the rod is still
visible its not seated. Use the fork center bolt to twist it and
drop into place.
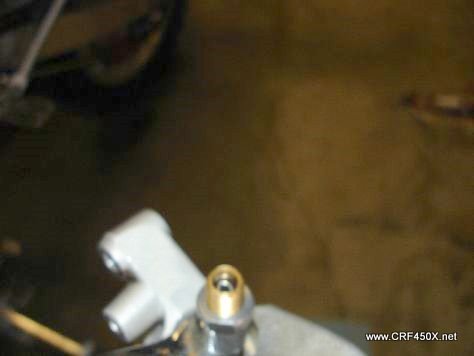
The rod is properly
seated in this photo.
Screw the center
fork bolt back into place. Tighten the bolt fully by hand.
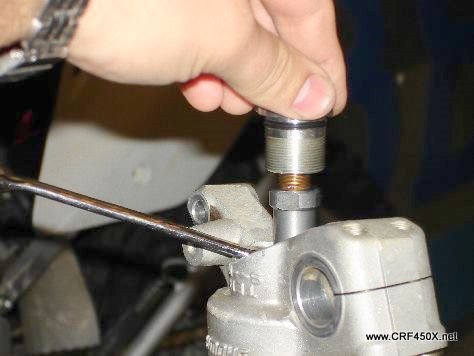
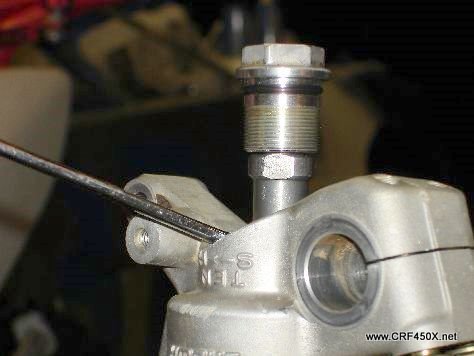
Check the clearance
between the lock nut and the center bolt. The sepc should
be 0.06-0.08 inches of clearance.
Tighten the lock
nut to the fork center bolt and torque to 16 Lbf-ft.
Remove the wrench
from underneath the fork center bolt and let the fork rod
drop back into the fork. Hand tighten then torque the fork center bolt to the
axle holder
and torque it down to 51 Lbf-ft.

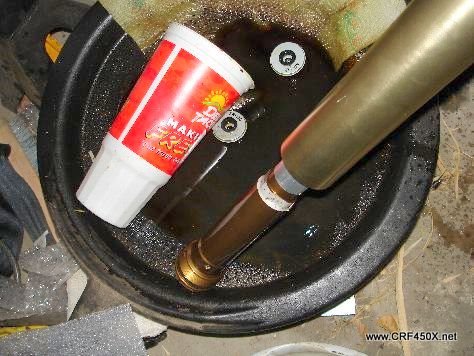
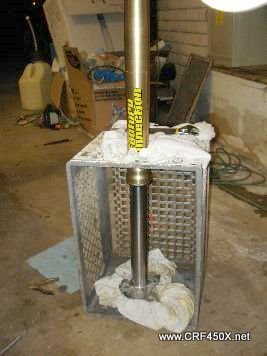
Here's the milk
crate I used as a fork older while working on the fork. A rag
cushions the fork from the garage floor.
Loosen the fork
cap from the outer fork tube.

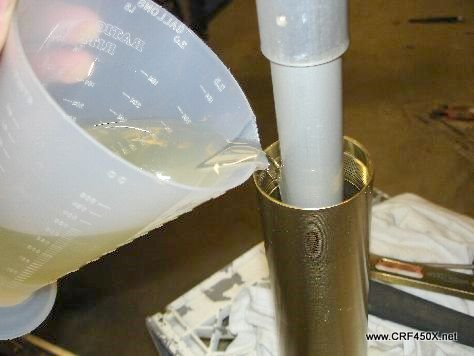
Using a ratio-rate
determine how much fluid you want in your fork. Subtract the
amount of fluid left in your fork from the total volume you want (remember the
chart
above). We filled ours with 370ml of fluid as recommended in our Factory
Connection suspenion owners manual. Stock is 338.

Flip the fork over
and pour the fluid into the fork.
Tighten the outter
fork tube and fork cap together. Only snug them with the wrench
the triple clamps actually compress the tube enough to keep them from seperating.
So not much force is needed.
Let any air back
out of the suspension from the air bleed screw.
Reset your rebound
adjuster back to where you had them set before.
Replace the forks
back in the triple clamp and make sure you have them adjusted
as they were before. We set ours at 3MM measured from the upper triple clamp
to the top of the upper fork tube right below the fork cap.

Go ride. So far
new fluid in forks has always been noticeable to me. These same
procedures will work for the CRF450R. I'm sure it applies to most SHOWA forks
as well.
Also, it's probably a good idea to clean your bike anytime before you work on it. As you'll notice I didn't do too good a job and the axle holder has a bunch of dirt on it. If you drop any of this in the fork it wouldn't be good. So do a better cleaning job than I did.
CRF450R CRF450X
Showa Fork Rebuild Procedures / Steps
Required Parts:
Fork Fluid - We used 5 weight from Maxima
Pivot Works Fork Seal Kit - or you can purchase just new seals and bushings
if required. Factory connection makes a superior Fork seal that has a more pliable
rubber and seals a little better.
First off measure
how high your forks sit above the top triple clamp.
Remove your front
wheel and brake caliper.
Remove your lower
fork protectors.
Loosen your upper
and lower triple clamps and lower the fork down so you can
place the fork wrench between the triple clamp and the fork. Tighten the lower
clamp lightly to hold the fork tube while you loosen it. Once you've loosened
the
top cap, remove the fork.
Mark down how many
clicks out you have your rebound adjuster at and then turn
counterclockwise until it stops.
Hold the outer fork
tube and completely loosen the fork cap.
Slide the outer
tube down from the fork cap.
Remove the air bleed
screw on the fork cap.
Drain the forks
completely. See your owners manual page 87 for how much
fluid will remain after you have drained the forks.
Hand tighten the
cap and upper fork tube back together. Replace the air bleed screw.
Flip the fork over,
you'll be loosening this bolt The fork center bolt.
We used a breaker
bar and a crescent wrench to hold the fork foot in place.
Once the bolt is
loose, press down on the fork leg and the inner rod will come out of
the fork. Place a 10mm wrench around the tube between the foot and the center
bolt to keep it up and in place.
Place a wrench on
the lock nut and a socket on the fork center bolt.
Remove the fork
center bolt.
Use the fork center
bolt to remove the rod down in the fork. Slightly twise the fork
to remove the rebound adjustment rod.
Completely remove
the rod.
Here's the rod and
adjuster.
Remove the wrench
and let the rod slide back into the fork leg.
Use a screw driver
to pry the dust seal from the upper fork tube.
Completely slide
up the dust seal.
Use a screw driver
to remove retaining ring.
Now grab the lower
fork leg in one hand and the upper fork leg in the other.
Collapse the tube and pull them apart in the same fashion as a slide hammer.
The lower fork leg will come loose (it makes a mess so be prepared).
Place the spring back into the upper fork tube. This is what you'll now have.
Here's the lower
fork tube with both the bushings, the washer and the seal.
Use a screwdriver
to pry the upper bushing apart and remove it from the lower
fork leg.
Remove the lower
bushing from the lower fork leg.
Remove the washer
from the lower fork leg.
Remove the seal
from the lower fork leg.
Remove the retaining
ring from the lower fork leg.
Remove the dust
seal from the lower fork leg.
Clean and check
your lower fork leg for any problems. Any deep nicks can tear
new seals. Here's a pretty good gouge on one, but we'll run it.
Place a sandwich
bag over the lower fork leg.
Grease up the sandwich
bag so you don't tear the seals as you put them on.
Place the dust seal
on first. Spring facing towards the bottom of the fork.
Place the reatining
ring on next followed by the fork seal. With the spring facing up
part number facing down.
Remove the baggy
and place the washer back on.
Place the Lower
bushing back into place. If your reusing your old bushing make
sure to check the inside surface of this bearing. It's teflon coated and should
be black
with no silver or copper showing through it. If any of the surface isn't black
the
bushing should be replaced. Replace the upper fork bushing but inspecting it's
outside surface.
Place the lower
fork tube back over the spring into the upper fork tube. Slide
the lower bushing back down into the upper fork tube.
Use the seal/bushing
driver to press them back down into place again using a
slide hammer motion. Not much pressure or force is needed for this.
Make sure it's seated
then lower down the washer into the upper fork tube.
Press the fork seal
back into place and use the fork/seal driver to ensure it's seated.
Place the retaining
ring back into place ensuring that it's seated in the grove all
the way around.
Place the dust seal
back into place.
Using your wrench
again push down on the fork foot and push the outer rod back
out and place the wrench underneath.
Place the rebound
adjustment rod back into place and ensure it's seated.
If the rod is still
visible its not seated. Use the fork center bolt to twist it and
drop into place.
The rod is properly
seated in this photo.
Screw the center
fork bolt back into place. Tighten the bolt fully by hand.
Check the clearance
between the lock nut and the center bolt. The sepc should
be 0.06-0.08 inches of clearance.
Tighten the lock
nut to the fork center bolt and torque to 16 Lbf-ft.
Remove the wrench
from underneath the fork center bolt and let the fork rod
drop back into the fork. Hand tighten then torque the fork center bolt to the
axle holder
and torque it down to 51 Lbf-ft.
Here's the milk
crate I used as a fork older while working on the fork. A rag
cushions the fork from the garage floor.
Loosen the fork
cap from the outer fork tube.
Using a ratio-rate
determine how much fluid you want in your fork. Subtract the
amount of fluid left in your fork from the total volume you want (remember the
chart
above). We filled ours with 370ml of fluid as recommended in our Factory
Connection suspenion owners manual. Stock is 338.
Flip the fork over
and pour the fluid into the fork.
Tighten the outter
fork tube and fork cap together. Only snug them with the wrench
the triple clamps actually compress the tube enough to keep them from seperating.
So not much force is needed.
Let any air back
out of the suspension from the air bleed screw.
Reset your rebound
adjuster back to where you had them set before.
Replace the forks
back in the triple clamp and make sure you have them adjusted
as they were before. We set ours at 3MM measured from the upper triple clamp
to the top of the upper fork tube right below the fork cap.
Go ride. So far
new fluid in forks has always been noticeable to me. These same
procedures will work for the CRF450R. I'm sure it applies to most SHOWA forks
as well.
