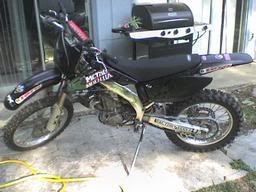
HOW TO: ProMotoBillet End Cap Install
  • Asmith
    Posts:14381
    Joined:Mon Apr 10, 2006 7:52 am
    HOW TO: ProMotoBillet End Cap Install

    by Asmith » Fri Jun 29, 2007 10:21 pm

    Project: Modify your CRF 450R exhaust can and convert for trail use by installing the ProMotoBillet Endo end cap with spark arrestor.

    Image

    Tools needed: Drill, 3/16” drill bit, Hi Temp Silicone Sealant, Rivet Gun, Center Punch, 1/16" Pin Punch, Hacksaw, Allen wrench

    Step One:

    Use a 1/16" pin punch and a hammer to drive the stainless steel rivet pins through the rivet.

    Image

    Step Two:

    Using a 3/16” drill bit, drill out the existing rivets holding the stock end cap in place, make sure to remove the head of the rivet.

    Image

    Step Three:

    Use a pin punch or similar device and a hammer, push the rivets through the hole and through the stock end cap.

    Image

    Step Four:

    Pull the stock end cap out of the muffler. Remove all
    pieces of the old rivets from the packing material inside of the muffler canister.

    Image

    Step Five:

    Cut off the portion of the inner core that is sticking out of the muffler so that it is flush with the outer canister of the muffler. This is easily accomplished with a hacksaw. Be careful not to cut into the aluminum canister. The inner core must be flush with the aluminum canister or the spark arrestor screen could be damaged.

    Image

    Step Six:

    Smear a small amount of silicone sealant to the stepped portion of the new end cap receiver and around the receiver of the inner core. I used this sealant ( Hi Temp Silicone ).

    Image

    Step Seven:

    Install the new end cap receiver, make sure that the receiver is pushed up tight to the muffler.

    Image

    Step Eight:

    Install one rivet at a time by drilling a 3/16” hole at each rivet hole location. Each time you drill a hole and install a rivet make sure that the end cap is pushed up tight to the muffler.

    Image

    Install rivet.

    Image

    Step Nine:

    Clean up excess silicone sealant with Lacquer Thinner or Carb cleaner and paper towel.

    Image

    Step Ten:

    Insert the spark arrestor screen and check for clearance with the inner core.

    Image

    Step Eleven:

    Install the cone nozzle with three M6 bolts using an Allen wrench.

    Image

    Finished!!!!

    Image

    Optional Step Twelve:

    Remove lower M6 Bolt and install Quiet core.

    Image
  • User avatar
    poway450
    Posts:228
    Joined:Sat Oct 07, 2006 7:39 pm

    by poway450 » Mon Jul 30, 2007 2:40 pm

    does anyone know if this decreses the power on the 450r
  • raiders_best
    Posts:12
    Joined:Sun Jun 25, 2006 8:13 pm

    by raiders_best » Sun Aug 12, 2007 7:52 pm

    Does the quite core only fit if You have that tip that points down because when i went to my local shop i asked for the quite core and i just got the core no extra little tip?
  • Asmith
    Posts:14381
    Joined:Mon Apr 10, 2006 7:52 am

    by Asmith » Sun Aug 12, 2007 8:00 pm

    The tip that points down IS the quiet insert...what did you buy???
  • raiders_best
    Posts:12
    Joined:Sun Jun 25, 2006 8:13 pm

    by raiders_best » Sun Aug 12, 2007 8:06 pm

    i will post a pic soon I bought what ever quite core they gave me with the end cap.
  • WOJIN
    Posts:93
    Joined:Thu May 24, 2007 9:07 am

    by WOJIN » Tue Aug 14, 2007 9:23 am

    my end cap did not come off easy at all. i went through hell with it for about 2 hours. ripping out the silicon, heating it up, beating it with a hammer, it just didnt want to come out
    2007 450R
    Image
  • nedirtbikr
    Posts:1261
    Joined:Thu Jan 06, 2005 12:28 pm

    by nedirtbikr » Tue Aug 14, 2007 9:35 am

    poway450 wrote:does anyone know if this decreses the power on the 450r
    Wondering this also...

    BTW, Agent...nice write up! Thanks!
    2006 CRF450R (For Sale)
    A-47753 (Jumpin' dirt and clouds!)
    Proud member of the Hamster Nation!
  • User avatar
    Jethro
    Posts:285
    Joined:Tue Apr 17, 2007 10:25 am

    by Jethro » Tue Aug 14, 2007 10:17 am

    i did notice a little power loss with mine, though it is an older model, but it was very small loss. you can just tell a very very slight sog when you leave on the bottom of a gear that is slightly taller then your speed. other then that no complaints and no tickets from the rangers at state areas.
    "Running is not a plan, Running is what you do when the plan fails"
    Image
  • raiders_best
    Posts:12
    Joined:Sun Jun 25, 2006 8:13 pm

    by raiders_best » Tue Aug 14, 2007 10:23 am

    ^^^^I know what you mean WOJIN lol except I got tired of tring to get off in tacked so it only took about 2 5 mins.


    Image
  • WOJIN
    Posts:93
    Joined:Thu May 24, 2007 9:07 am

    by WOJIN » Mon Aug 20, 2007 8:44 am

    yup thats what mine looked like. i tried to do it all nice and clean, but after 2 hours of that and the realization that its not going back on, i resorted to brute force.


    looks like you tried drilling holes in the tip to pry from too, i tried that as well
    2007 450R
    Image

Who is online

Users browsing this forum: No registered users and 8 guests